Inviting Contributors and Collaborators
How to Give People Access to Your Squarespace Website
Step 1. Open Site Settings
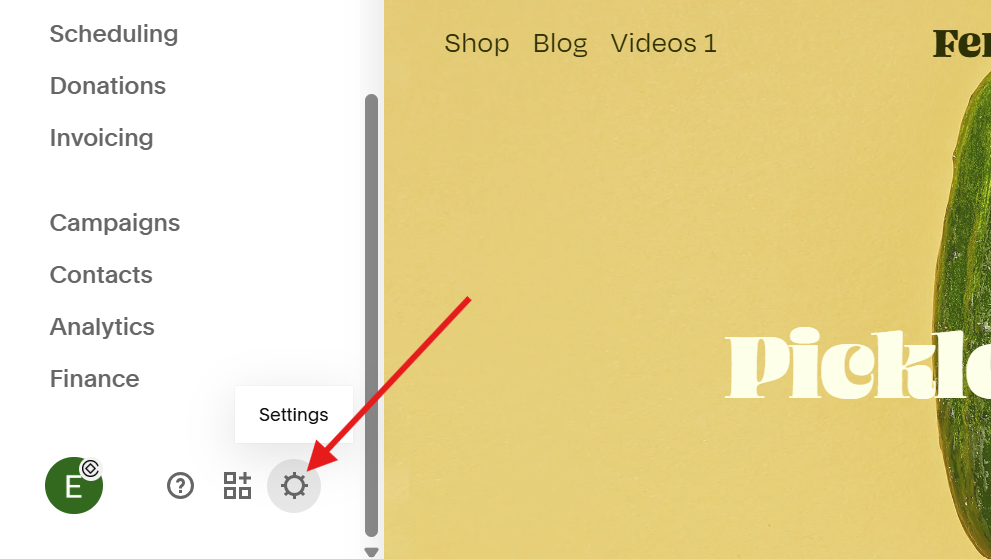
In the settings panel on the left, scroll down the to the bottom and click the gear icon.
Step 2. Permissions & Ownership
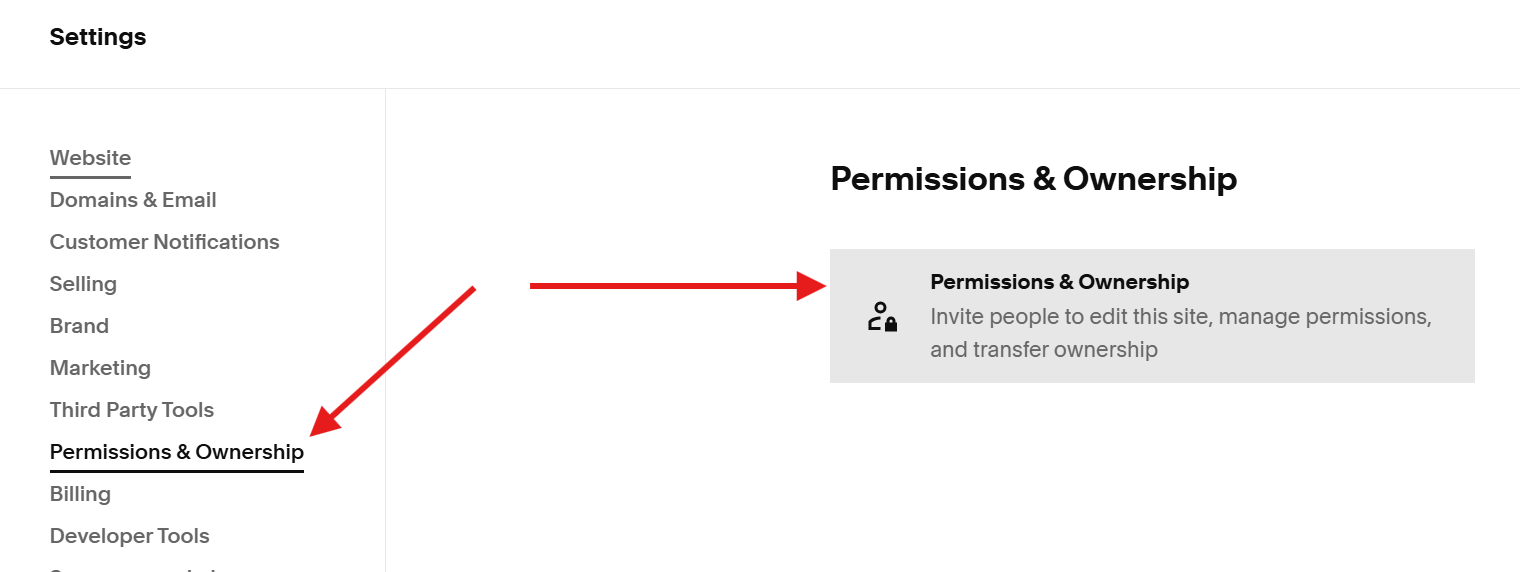
Click Permissions & Ownership on the left menu then click the Permission & Ownership button.
Step 3. Add Name and Email
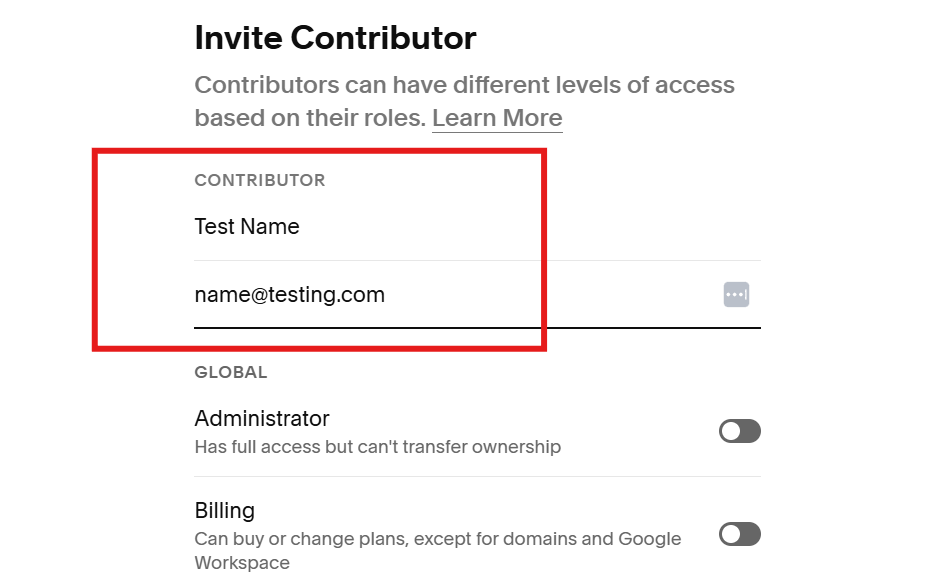
Enter the name and email of the person you’re granting access to.
You don’t need to add the full name of the person but you need to add the complete email address.
Step 4. Select Access Type
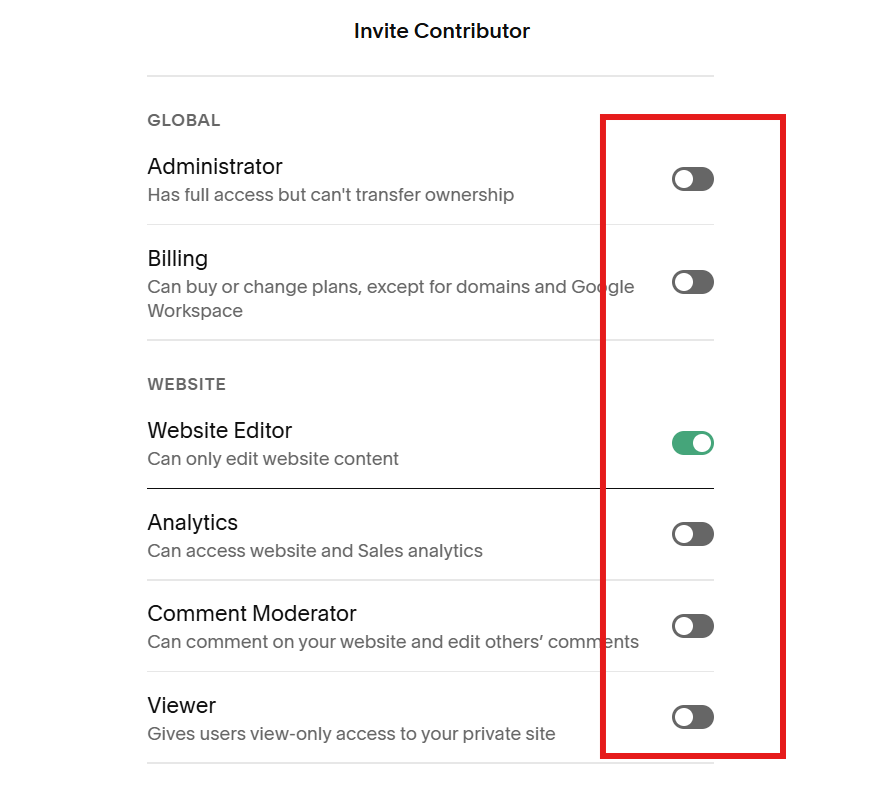
Choose the access type/level you want to grant and click the button next to it.
The button will turn green to indicate that you’ve selected that access level and you can change the access level whenever you want.
Can you add more than 1 access type?
Yes, you can add multiple access types except for Administrator because Administrator has access to all types.
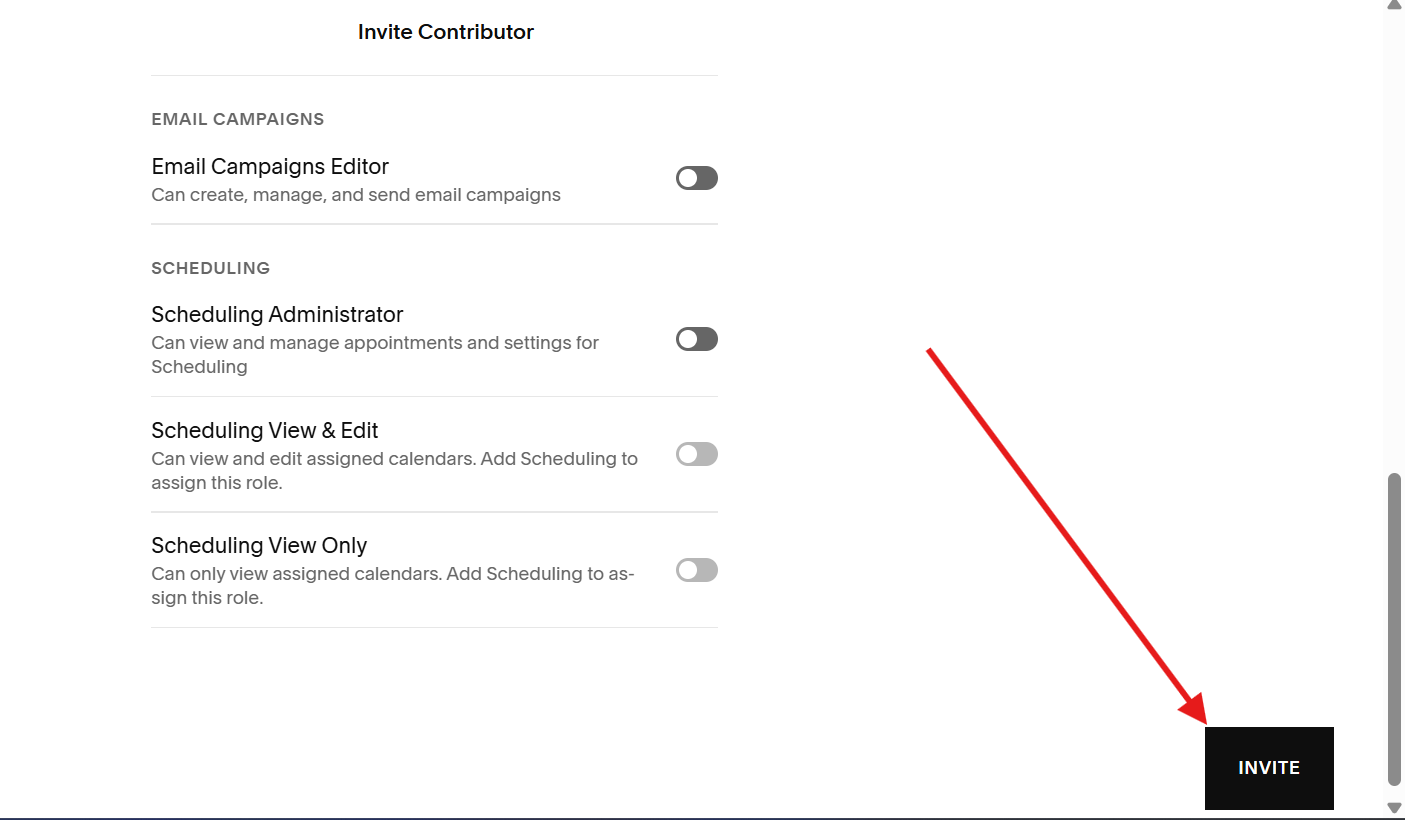
Step 5. Send Invite
Scroll down to the bottom and click the INVITE button to finish. The invite will be sent to the person’s email.
How to Give People Access to Your Squarespace Website
Need to give your designer, copywriter, or VA access to your Squarespace site without sharing your login? Here’s exactly how to invite them as a contributor with the right permissions.
Step 1. Open your site settings
From your Squarespace dashboard, open the site you want to share access to. In the left-hand panel, scroll down and click the gear icon to open Settings.
Step 2. Go to Permissions & Ownership
In the Settings panel, click Permissions & Ownership. This is where you can see the current site owner, manage contributors, and control what each person can access.
Step 3. Invite your contributor
Click Invite contributor. When the pop-up appears, enter the person’s name and email address. The name is just for reference, but the email address must be the one they use (or will use) for their Squarespace account.
Step 4. Choose the right access level
Use the toggles to select what this person can do on your site. For example:
Turn on Website editor if they’ll be updating pages and blog posts.
Turn on Store management if they need to manage products and orders.
Turn on Analytics if they only need to view your site stats.
Turn on Administrator only if you fully trust them with everything, including billing and site settings.
You can combine multiple permissions (for example, Website editor + Store management), and you can change or remove their access at any time.
Step 5. Send the invitation
When you’re happy with the permissions, scroll down and click Invite. Squarespace will send an email to your contributor with a link to accept the invite and log in (or create a Squarespace account if they don’t have one yet).
If they don’t see the email, ask them to check their spam folder or search for emails from no-reply@squarespace.com. You can also copy the invitation link from the Invites sent area and send it to them directly.